What's New in CCC® Estimating for June 2025
Click here to view the What’s New release notes for CCC® Estimating.
Note: The availability of the features listed below may vary based on the products licensed to your company.
CCCONE.COM - Web Estimating
Engage: Support for Additional Customer Photos
When a customer submits an online request for a photo estimate through Carwise.com, the photos provided by the customer are available to view on the workfile. This includes:
The four corners of the vehicle (driver front, passenger front, driver rear, passenger rear)
Three (3) damage close ups (left, center, and right)
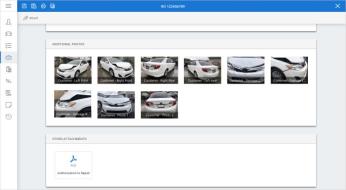
With this release, we've expanded support to include four (4) additional photos. These photos are optionally provided by the customer. When provided they will also be available for view on the workfile.
To access this feature on cccone.com
Open a workfile with a photo estimate request.
Go to the Photos screen in the workfile.
Scroll to the bottom of the screen where Additional Photos is displayed.
Thumbnails that start with "Customer" indicate photos supplied by the customer. Newly supported photos will be displayed as:
Consumer – Other Photo 1
Consumer – Other Photo 2
Consumer – Other Photo 3
Consumer – Other Photo 4
Note:
- The customer's ability to request online photo estimates is controlled within Carwise Settings for the shop location.
- Online photo estimate functionality is only available to shops with the following product: CCC Photo Estimate.
- CCC Photo Estimate is only available to shops with the following product: CCC Engage.
- Photos supplied by the customer cannot be shared with insurance.
- Photos supplied by the customer cannot be deleted or re-named.
- Photos supplied by the customer do not count towards workfile attachment storage limits.
CCC Payroll: Tax Filing Preview
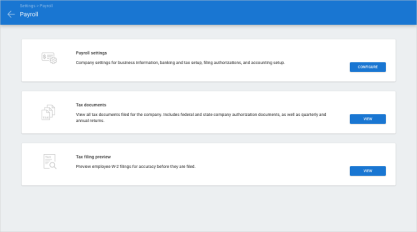
Shops licensed with CCC Payroll can now preview Tax Filings for the year. This allows the shop to preview employee W-2s for accuracy before they are filed.
Follow the steps below to view the Tax Filing Preview:
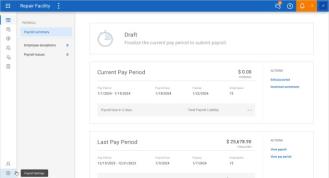
On the Payroll Dashboard and select Payroll Settings.
On the Tax filing preview section, select View.
Note:
- Shop must be licensed with the following product to access company Payroll Settings and the Payroll Dashboard: CCC Payroll
- User must have the following security permission to access company Payroll Settings, including the Tax filing preview: Payroll - Manage payroll activities as an authorized signatory for the organization
- Content available within the Tax filing preview component is supplied and managed entirely by Check, our third party payroll provider
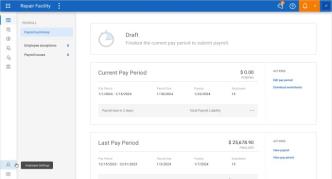
CCC Payroll: Payroll Dashboard Access to Settings
Shops licensed with CCC Payroll can now preview Tax Filings for the year. This allows the shop to preview employee W-2s for accuracy before they are filed.
Note: Uses must have appropriate security permissions to access this screen.
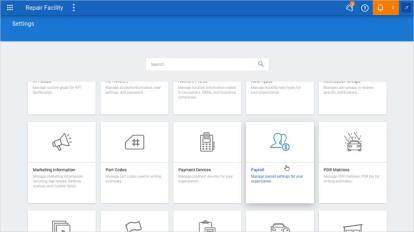
To access Payroll Settings and Employee Settings, select the main menu button in cccone.com. Select Payroll, then Payroll Dashboard.
To edit any employee in the shop location, select the Employee Settings icon.
To access company level payroll settings, tax documents, and tax filing previews, select the Payroll Settings icon.
Note:
- Shop must be licensed with the following product to access the Payroll Dashboard: CCC Payroll.
- User must have the following security permission to access Employee Settings: Search and view (read-only) employees on cccone.com.
- User must have the following security permission to edit employee records: Create, search view, edit, and deactivate employees.
- User must have the following security permission to access company Payroll Settings: Payroll - Manage payroll activities as an authorized signatory for the organization.
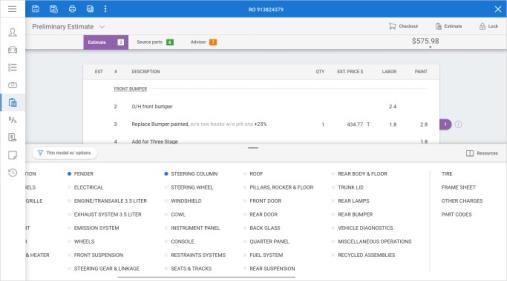
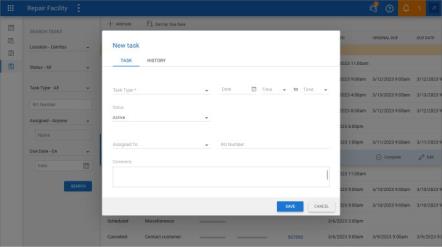
Tasks: Workfile Tasks
Shops can now manage Tasks on a Workfile in cccone.com. Users can view all Tasks associated with the Workfile, edit Task details, and create new Tasks.
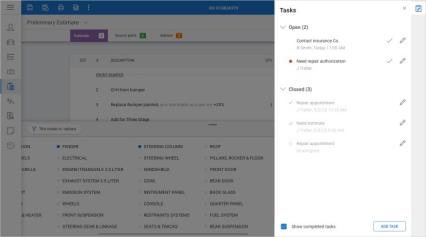
To manage Workfile Tasks, select the quick action button in the blue bar. The Tasks panel displays with the Open Tasks displayed by default.
View the graphic below to review the Tasks Panel actions.
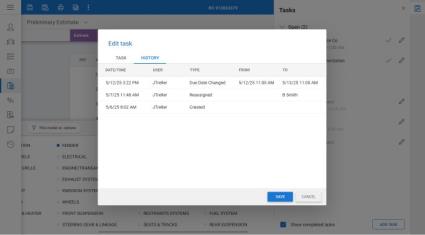
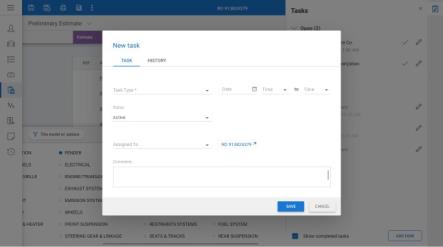
To create a New Task, enter any necessary information on the New task window and select Save.
To edit a Task, users can update the Assigned To, Due Date, Task Duration, and Status fields.
Note:
- Access to Workfile Tasks is available to all users with the ability to open Workfiles on cccone.com.
- There are no additional permissions required to create Tasks on the Workfile.
- Once saved, Task Type on the task cannot be changed.
- Workfile tasks cannot be deleted or associated with a different Workfile - status can be changed to Complete or Cancelled.

Tasks: Tasks Dashboard
Shops now have access to the Tasks Dashboard on cccone.com. The two views included for the user to manage Tasks are Tasks Dashboard and Task Search.
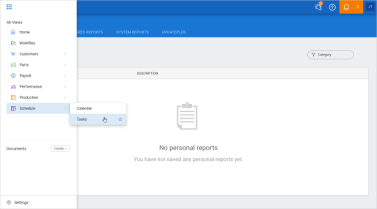
To access the Tasks Dashboard in cccone.com, select the main menu button. Select Schedule, then Tasks.
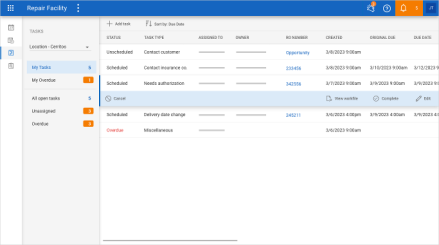
The Tasks Dashboard view displays by default and shows open Tasks categorized into queues.
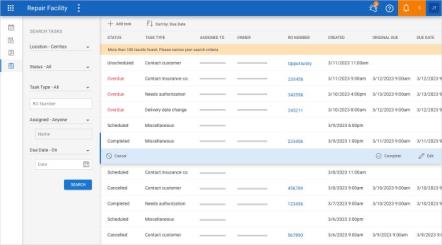
To access the Search view, select the Task Search icon. All the Tasks within the shop location are displayed.
Follow the steps below to create a New Task:
Select the Add Task button.
Use the drop-down menu to select a Task Type.
Enter additional detail as desired, then select Save.
Note:
- Access to the Tasks Dashboard and Task Search is available to all users with a CCC ONE login.
- As with all items in the main menu, the Tasks option can be added to menu favorites.
- Task visibility within the Tasks views may be limited based on security permissions.
- Users with either of the following permissions can view all tasks in the organization: Tasks - Manage tasks created by or assigned to others Calendar - Manage the shop calendar and schedule of appointments.
- There are no additional permission required to create tasks (anyone with a CCC ONE login can create a task).
- Once saved, Task Type on the task cannot be changed.
- Once saved tasks cannot be deleted or associated with a different Workfile - status can be changed to Complete or Cancelled.
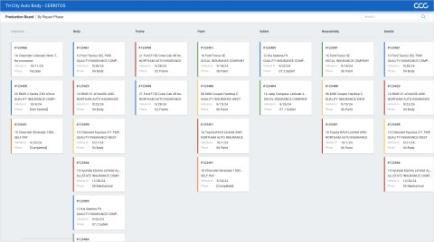
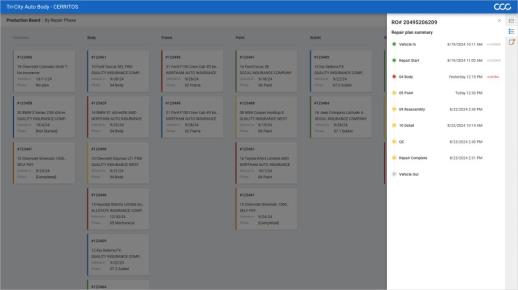
Production Board: Shared Boards
Shops enabled with Repair Workflow Production Management features now have the ability to share Production Boards, allowing shops clearer visibility to the work in progress.
With Shared Boards, anyone in the shop can have read-only access to repair order summary information, repair plan status, and production related notes.
To access Production Boards in cccone.com, select the main menu button and choose the Production Boards option.
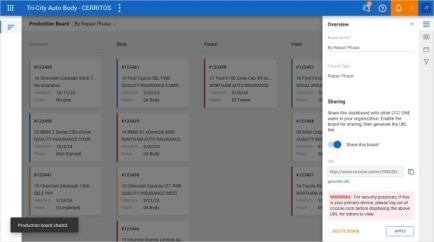
Follow the steps below to share a Production Board:
Select an existing board to share or create a new one.
Select the Settings icon in the toolbar.
Under Overview settings, use the toggle to Share this board.
Copy the generated URL to share it with the person or device desired.
Follow the steps below to access a shared Production Board:
Open a browser window on the device where the board will be displayed
Paste the board URL into the browser address bar
Login to cccone.com using your regular ID
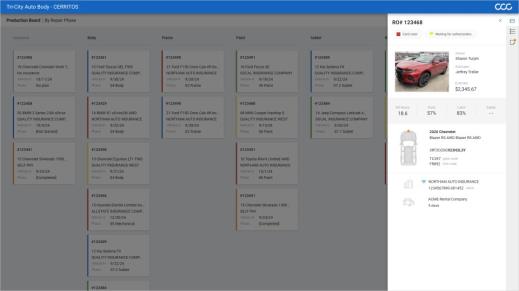
Shared Production Board content is read-only and cannot be edited. While viewing the board, users can scroll to view repair orders in the various phases.
Note:
- Production Boards are available to shops licensed with the following product: Repair Workflow Production Management.
- User must have the following permission to enable Production Board sharing: Create, edit, delete, and recalculate repair plan.
- User must have a valid CCC ONE login to access a shared Production Board.
- All content in the shared board is read-only, regardless of the login used to display the shared board.
- If you are already logged into cccone.com, it is important to log out before logging into a shared Production Board on the same device.
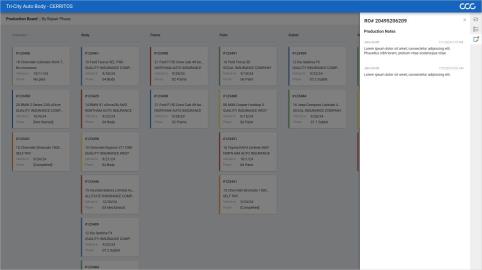
Production Board: Shared Boards (continued)

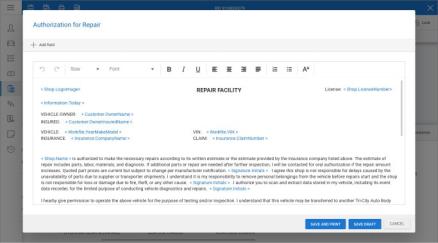
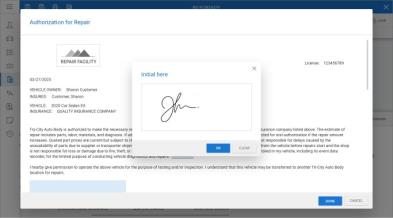
Forms: Electronic Signature Capture
Shops enabled with Forms and Correspondence functionality can now create form letters on cccone.com that will capture electronic signatures and/or initials.
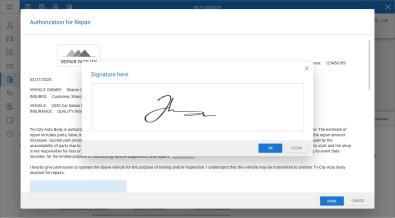
When creating new form letter templates, Signature and Initial tags can be inserted in the form letter body. When completing these forms via cccone.com, placeholders for electronic signature are displayed. The customer can then use a stylus, finger, or mouse to sign where signature or initials are needed.
To create a form letter template with signature capture:
Go to Settings on cccone.com, then select Form Letter Templates
Open an existing form to Edit, or select Add to create a new one
Add template text as desired, then place the cursor where you want to insert initial or
signature capture
Select Add field, then select Initial or Sign
Select Save
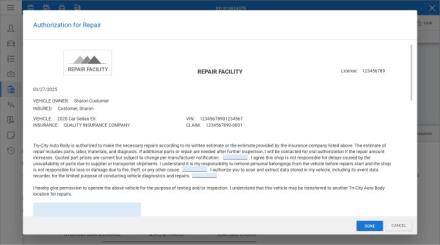
To access Form Letters with signature capture, navigate to the Workfile menu and select New. Then, under the Forms section, select Letter.
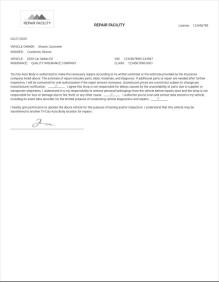
The form is completed and automatically downloaded as a PDF file. Opening the PDF you'll find contents of the letter template include initials and signatures captured.
Note:
- Shop must be licensed with the following product to access Form Letters: Correspondence.
- Shop must have Centralized Forms enabled to access signature capture functionality within Form Letters.
- User must have the following security permission to create Form Letter Templates on cccone.com: Manage centralized forms.
- User must have the following security permission to create Form Letters on the workfile: Create and edit workfiles.
- Signature field tags are only available when creating/editing form letters via cccone.com - tags are not available in the desktop application.
- Signature field tags are available for use when creating ad hoc form letters within the workfile.
- Signature field tags can be inserted anywhere in the form letter body.
- Signature field tags can be used when editing form letter template text on forms created within the workfile.
- Electronic initial/signature capture within form letters is only available cccone.com - feature is not available in the desktop application.
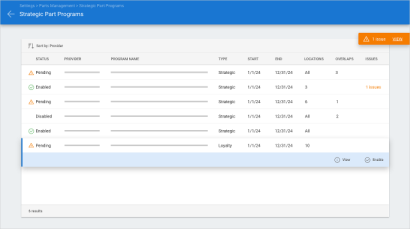
Strategic Parts Programs: Support for Loyalty Program
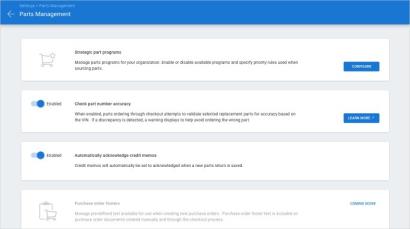
Shops now have the ability to manage part Loyalty Programs within the Parts Management settings in cccone.com.
When a part vendor has a new Loyalty Program available for the shop, the program is displayed in the list of available programs.
To enable part Loyalty Programs:
Navigate to Settings on cccone.com
Select Parts Management
Go to the Strategic parts program section, then click Configure
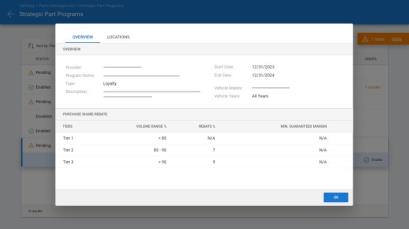
Select a Loyalty program from the list, then click View to view program details
Close the program details fly-out, then click Enable to enable the program
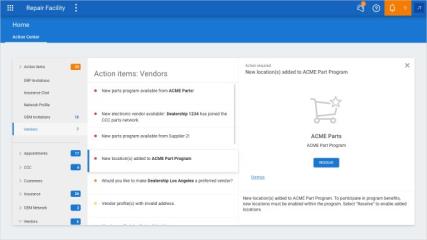
As new loyalty programs become available, the shop may receive a Vendors action item in Action Center. The action item will specify the vendor, program name, and provide an "Enable" action. Clicking Enable will navigate to Strategic Parts Program settings where the program can be enabled.
After a program is enabled, the shop may receive notifications regarding program updates and program expiration. These also appear in Action Center under Vendor > Messages.
Note:
- User must have the following security permission to enable and edit Strategic Parts Programs: Edit repairer profile.
- The first time a user navigates to Strategic Parts Programs settings, a Terms of Use screen will appear. User must accept the Terms of Use before parts programs can be enabled.

Strategic Parts Programs: New Locations Action Item
After a Strategic Part Program or Loyalty Program is enabled for the company, additional locations within the shop organization can be added to the program.
The shop must enable the program for the newly added locations from within an Action Item in the Vendors category.
To enable a program for a new location, navigate to the Vendors section of the Action Center.
Choose a New location(s) added Action Item, then select Resolve.
Note:
- User must have the following security permission to enable and edit Strategic Parts Programs settings: Edit repairer profile.
- The first time a user navigates to Strategic Parts Programs settings, a Terms of Use screen will appear. User must accept the Terms of Use before parts programs can be enabled.
CCC ONE Desktop Release 53
Calibration Guidelines
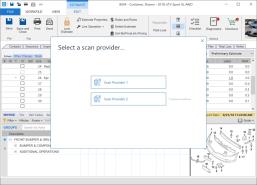
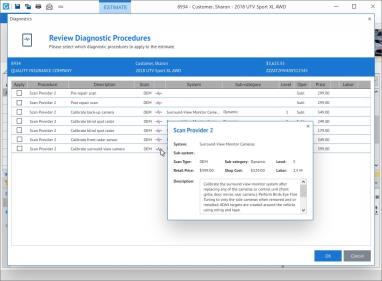
Shops enabled with Calibration Guidelines now have access to scan provider diagnostic and calibration recommendations on communicated workfiles. When the shop receives an assignment from an insurance company configured for Calibration Guidelines, the shop may get scan provider recommendations on the workfile. This feature does not include the Diagnostics Dashboard, manual scan events, or shop procedures. However, scan provider recommendations can be obtained on the workfile under certain conditions.
To access this feature:
Open a communicated workfile (see notes below).
Click the Diagnostics button.
If prompted, select a scan provider.
Select one or more items in the Review Diagnostic Procedures window, then click OK.
Selected operations are added to the estimate under the Vehicle Diagnostics group. Operation, price, and labor details are populated based on the information returned by the scan provider in the diagnostic procedures window. A procedures reviewed event is also logged to workfile event history each time the user attempts to get calibration recommendations on the workfile.
Note:
- Shop must have the following product line enabled on this license to access this feature: DNGCG - Calibration Guidelines.
- Workfile must be a communicating workfile - Open Shop, DRP assignment, or externalized.
- Insurance company on the workfile must be configured with a scan provider.
- Shop location must have a corresponding scan provider configured with ADAS services enabled.
- User must have the following security permission to access diagnostic procedures on the workfile: Create and edit workfiles.
- This feature is separate from Diagnostic Workflow - Shop must have Diagnostic Workflow to access to the Diagnostic Dashboard, manual scan event capability, and the ability to create shop procedures.
- The procedures reviewed event logged to the workfile includes the following information: scan provider name, number of procedures returned, number of procedures added to the estimate
Central Review: Change Request Summary Report
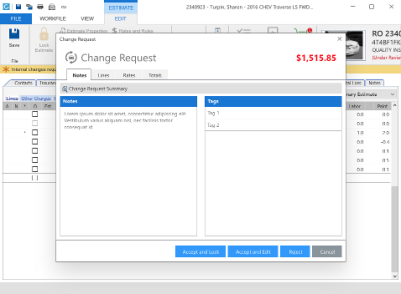
Shops enabled with Central Review Redline functionality now have access to Change Request Details in the Change Request Summary Report.
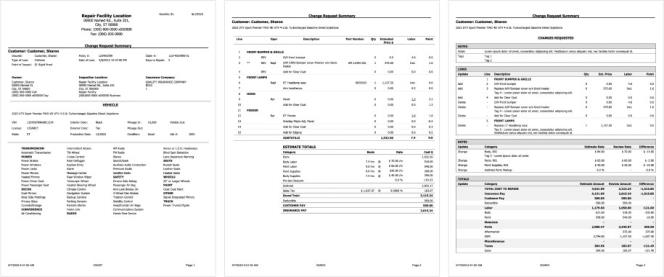
A new page was added to the report that includes all the exception detail and review notes from the Change Request form.
To access the Change Request Summary Report, select the Change Request Summary button in the Change Request window.
On the Changes Requested page, there are four sections - Notes, Lines, Rates, and Totals. Each section matches the tabs available in the Change Request window.
Each section includes the changes recommended by the reviewer, including all notes and tags.
Note:
- Shop must be licensed with the following product to for Central Review functionality: Central Review.
- Back-end activation of the following client feature is required to enabled Central Review Redline functionality: Enable Central Review Redlining.
- Once a change request is viewed, the Change Request Summary Report is added to the Print Workfile Documents window and the Attachments tab.
- Changes Requested detail in the Change Request Summary Report is not yet available on insurance change requests.
Quickly find your CCC Team members. Go to http://www.cccis.com/collision-repairers/team/ and follow the screen instructions.
