What's New in CCC® Estimating for May 2025
Click here to view the What’s New release notes for CCC® Estimating.
Note: The availability of the features listed below may vary based on the products licensed to your company.
CCCONE.COM - Web Estimating
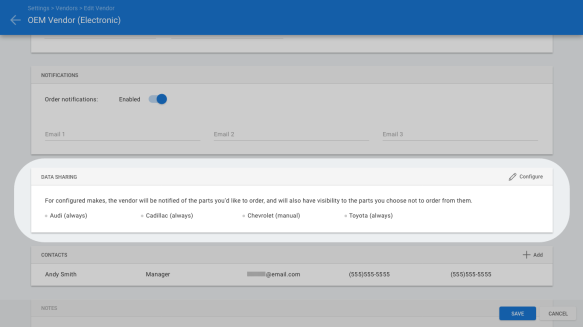
Vendors: Remove Data Sharing Settings
Vendor settings related to data sharing on electronic orders have been removed. Shops will no longer have the ability to share part information with vendors for parts not included in their order.
To access vendor settings:
Go to Settings on cccone.com.
Select Vendors.
Select a vendor from the results, then click Edit.
Note:
- Data sharing settings were only available on vendors enabled for electronic ordering.
- The following security permission is required to edit vendor settings: Create, search, view, edit, and deactivate vendors.
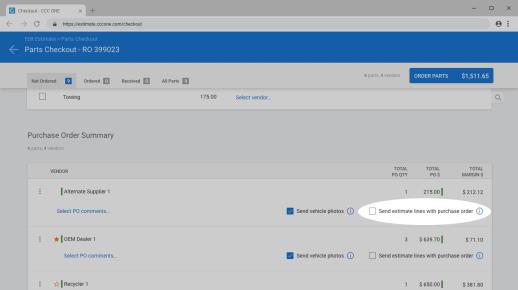
Checkout: Remove Data Sharing Option
The data sharing option in Checkout has been removed. Shops will no longer have the ability to share parts information with the vendor for parts not included in their order.
To access checkout:
Open a workfile with replacement parts.
Select Checkout at the top of the screen.
Note:
- Checkout may be launched from either cccone.com or the desktop application.
- The data sharing option was only available on electronic orders.
- The following security permission is required to order parts through Checkout: Create, search, view, and edit workfiles.
- Shops enabled with Repair Workflow Parts Management features also require the following security permission to order parts: Create, search, view and void purchase orders.
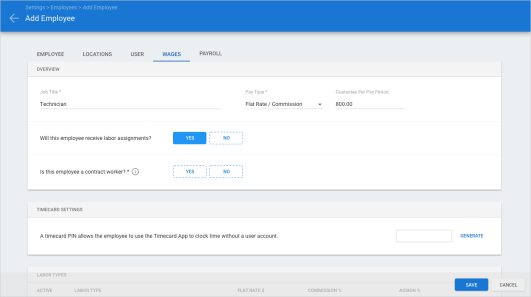
Employee Profile: Contractor Support for CCC Payroll
Shops enabled with CCC Payroll now have the ability to configure employees as contract workers. Contract workers can be included in a pay period and receive payment through CCC Payroll functionality as a 1099 employee. The process for assigning labor and creating paysheets for contract workers is the same as a standard employee. Additionally, contract workers can be configured to receive their payments via check or direct deposit.
To configure an employee as a contract worker:
Go to Settings on cccone.com.
Select Employees, then click Add.
Enter required information in the Employee screen.
Set the employee's home location in the Locations screen.
Enter required information in the Wages screen.
Select Yes, for Is this employee a contract worker?
Click Save.
Once setup as a contract worker, additional Payroll settings are available to complete configuration of the employee:
Contractor Setup - This settings module allows you to specify employee tax identification as a company or individual. You will also specify the preferred payment method (check or direct deposit) and have the employee sign the W-9 form.
Contractor Payments - This module provides a list of payments made to the contract worker via CCC Payroll. You can download the payment statement for any payment listed.
Tax Documents - This module provides a list of all state and federal tax documents associated with the contract worker.
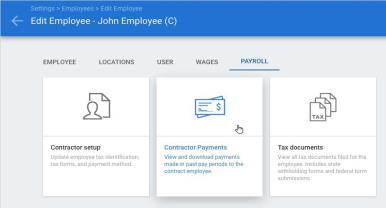
You can manage these settings in the employee profile or let the employee update their information via My Pay in the Mobile application.
Note:
- User must have the following security permission to edit employee information: Create, search, view, edit, and deactivate employees.
- The employee profile Wages screen is only available to shops licensed with the following product: Repair Workflow Labor Management.
- The contractor setting is available to all shops enabled with Repair Workflow Labor Management. However, Payroll settings for contract employees is only available to shops licensed with the following product: CCC Payroll.
- For shops enabled with CCC Payroll, the contractor setting cannot be changed once the employee profile is saved.
- When an employee is saved as a contract worker, CCC ONE automatically appends the employee display name with a "(C)".
- The "(C)" added to the employee display name may be manually removed if desired.
- Employee onboarding steps must be completed for contract workers before the employee can be included in a payroll.
- Contract workers that have not completed employee onboarding steps will appear in the Payroll Dashboard Employee Exceptions queue.
- Information in the Contractor Setup module is not stored by CCC. This information resides with Check, our third party payroll provider.
CCC Payroll: Employee Exceptions for Contract Workers
Shops enabled with CCC Payroll now have the ability to configure employees as contract workers. To insure that contract workers are configured properly for payroll, the Employee Exceptions screen within the Payroll Dashboard was updated.
Added Employee Type column.
Added exceptions specific to contract workers.
Added actions to resolve contract worker exceptions.
To manage employee exceptions:
Log into cccone.com and select the main menu in the upper left corner of the screen.
Select Payroll, then Payroll Dashboard.
Click the Employee Exceptions queue.
Select an employee record listed in results, then click the available action displayed.
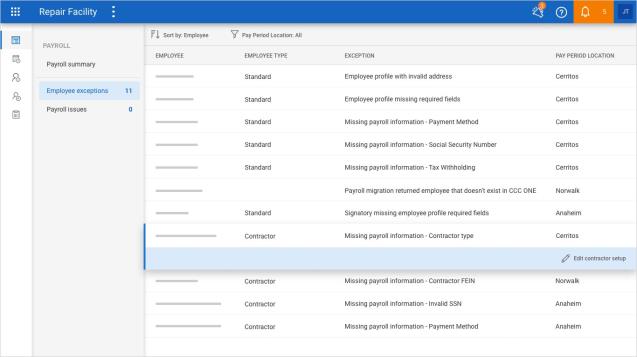
Before a contract worker can be included in a payroll, all employee exceptions must be resolved. The following exceptions may be seen when a new contract worker is created:
Employee profile with invalid address: This exception is triggered when the address in the employee profile is invalid or incomplete. To resolve the issue you must update address information in the employee profile.
Employee profile missing required fields: This exception is triggered when the employee profile is missing required information. To resolve the issue you must update information in the Employee screen of the employee profile.
Missing payroll information - Payment Method: This exception is triggered when a payment method for receiving payroll payments is not yet specified. To resolve this exception for a contract worker you must complete the Contractor Setup module under Payroll settings in the employee profile.
Missing payroll information - Social Security Number: This exception is triggered when a contract worker is setup as an individual and a Social Security Number has not yet been specified. To resolve this exception you must complete the Contractor Setup module under Payroll settings in the employee profile.
Missing payroll information - Invalid SSN: This exception is triggered when the Social Security Number entered for the contract worker is invalid. To resolve this exception you must update the Contractor Setup module under Payroll settings in the employee profile.
Missing payroll information - Contractor type: This exception is triggered when a contract worker has not yet specified contractor type as individual or business. To resolve this exception you must complete the Contractor Setup module under Payroll settings in the employee profile.
Missing payroll information - Contractor FEIN: This exception is triggered when a contract worker is setup as a business and the FEIN has not yet been specified. To resolve this exception you must complete the Contractor Setup module under Payroll settings in the employee profile.
Note:
- The Payroll Dashboard is only available to shops licensed with the following product: CCC Payroll.
- User must have the following security permission to access the Payroll Dashboard: Payroll - View the payroll dashboard.
- User must have the following security permission to edit employee information: Create, search, view, edit, and deactivate employees.
- Employee onboarding steps must be completed for contract workers before the employee can be included in a payroll.
- The employee may also resolve employee exceptions by updating My Account settings and completing the Contractor Setup module via the Mobile application.
- Information in the Contractor Setup module is not stored by CCC. This information resides with Check, our third party payroll provider.
CCC Payroll: Submit Payroll with Contract Workers
Shops enabled with CCC Payroll now have the ability to configure employees as contract workers. Contract workers can be included in a payroll and receive payment as a 1099 employee. To support this functionality, the View Payroll screen was updated to include contract worker payments.
|
To submit a payroll with contract workers:
|
|
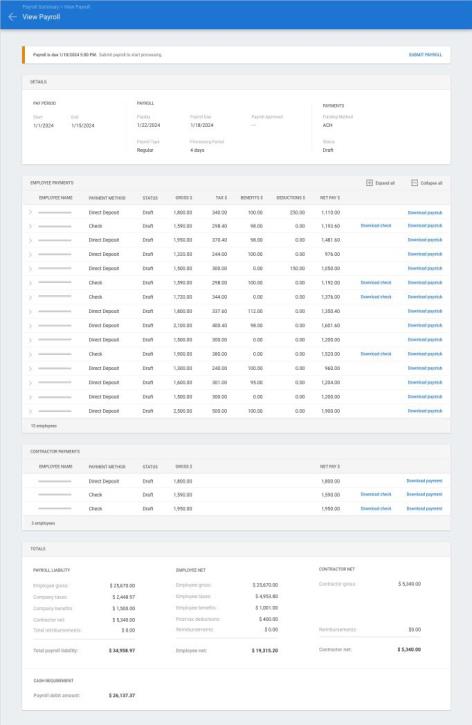
When contract workers are included in the payroll, a Contract Payments section is displayed in the View payroll screen. For each contract worker you'll see the total amount to be paid. And just as with standard employees, you can download the payment statement and paper check for print.
Also, the totals section of the View payroll screen was updated to include contractor payment details.
Note:
- The Payroll Dashboard is only available to shops licensed with the following product: CCC Payroll.
- User must have the following security permission to access the Payroll Dashboard: Payroll - View the payroll dashboard.
- User must have the following security permission to view payroll detail and submit payroll: Payroll - Manage payroll activities as an authorized signatory for the organization.
- When there are no contract workers included in the payroll, the Contractor Payments section is hidden on the View payroll screen.
- Employee onboarding steps must be completed for contract workers before the employee can be included in a payroll.
- Information displayed on the View payroll screen is not stored by CCC. This information is provided by Check, our third party payroll processor.
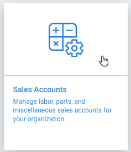
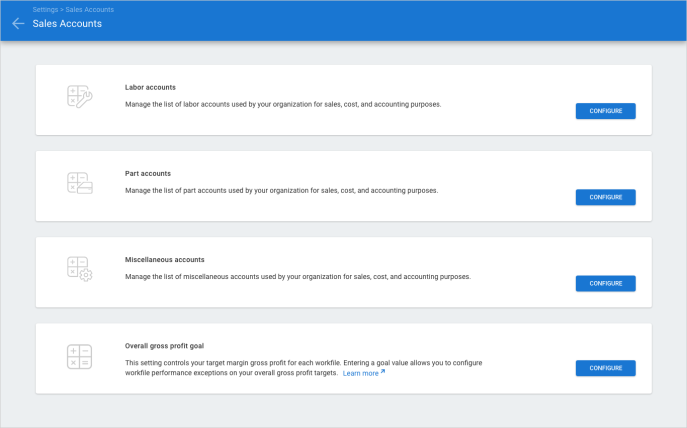
Settings: Sales Accounts
|
Shops enabled with Repair Workflow Repair Order Management features can now manage Sales Accounts settings on cccone.com. Sales accounts are used throughout CCC ONE for monitoring RO performance, exporting information to accounting connections, and running reports. Shops can customize display names for system required sales accounts as well as create additional custom accounts. |
|
To manage sales accounts settings:
Go to Settings on cccone.com.
Select Sales Accounts.
Locate the sales account type you want to manage, then click Configure.
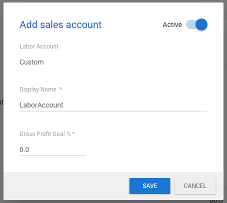
Add, Edit, or Reorder sales accounts as desired.
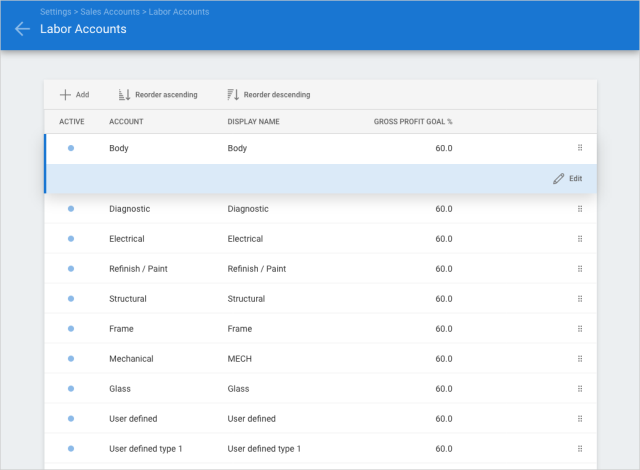
When configuring all types of sales accounts (i.e., Labor, Parts, and Miscellaneous), you can set the display name and gross profit goal for each account listed. Custom accounts can be added to suit your shop's needs.
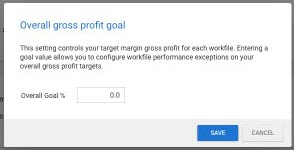
Additionally, you can specify an overall gross profit goal percentage. This setting will track the overall gross profit of the repair order as a holistic value, taking into account all sales accounts on the RO.
|
|
|
Note:
- Shop must be licensed with the following product to access part return reasons: CCWRO - Repair Order Management.
- User must have the following security permission to edit sales account settings: Edit repairer profile.
- Users with the following security permission will have read-only access to sales account settings: Edit repair facility profile or Search and view profiles (read-only).
- Custom accounts cannot be deleted once added to sales accounts. They can only be set to inactive.
- System required sales accounts cannot deleted or set to inactive. For example, part and labor types used by estimating.
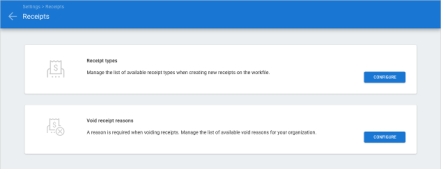
Settings: Receipts
|
Shops enabled with Repair Workflow Repair Order Management features can now manage Receipts settings on cccone.com. Receipts settings includes the following repairer level settings:
While a default list of receipt types and void receipt reasons is included when a shop is enabled with Repair Workflow functionality, the shop can customize these lists to suit their needs. |
|
|
To manage receipt settings:
|
|
|
|
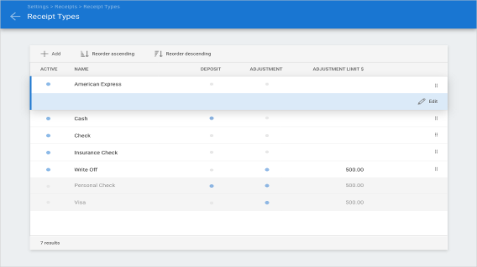
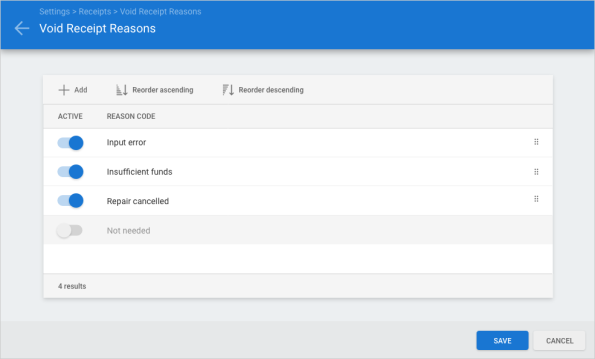
When configuring both receipt types and void reasons, you can activate or deactivate any item listed. You can also specify the order in which the items should be listed. You can quickly reorder items in the list using one of the Reorder buttons in the toolbar at the top of the screen. Or, you can use the grip control on a specific line item and drag it where you want.
When configuring receipt types, you can set the display name and flag as available for deposit and/or adjustment. When flagged for adjustment, you can specify an adjustment limit as well. The adjustment limit will prevent creating adjustment receipts greater than the amount specified without special permission.
Note:
- Shop must be licensed with the following product to access receipt settings: CCWRO - Repair Order Management.
- User must have the following security permission to edit receipt settings: Edit repairer profile.
- Users with the following security permission will have read-only access to sales account settings: Edit repair facility profile or Search and view profiles (read-only).
- Custom accounts cannot be deleted once added to either Receipt Types or Void Receipt Reasons. They can only be set to inactive.
- You must have at least one active item in both Receipt Types and Void Receipt Reasons lists.
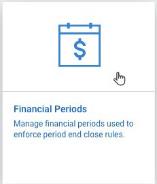
Settings: Financial Periods
|
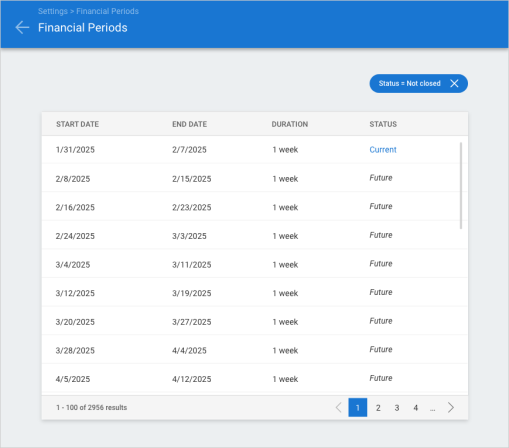
Repair Workflow shops enabled with the Financial Periods feature now have the ability to define financial periods with a 1-week duration. Previously, financial periods only supported 4- and 5-week duration. |
|
To configure Financial Periods with 1-week duration:
Go to Settings on cccone.com.
Select Financial Periods.
Click Configure.

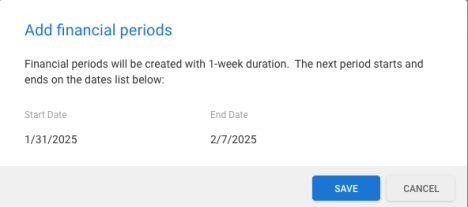
Select 1 WEEK duration and specify the first period Start Date, then click Next.

Verify first period start and end dates, then click Save.
You're all set! Financial periods for the next 20 years are automatically created with 1-week duration. Now you can enable lock period settings in the repair facility profile via CCC ONE desktop.
Note:
- Shop must be licensed with the following product to enable Financial Periods settings: Repair Workflow Repair Order Management.
- Back-end activation of the following feature is required: Enable configuring Fiscal Period.
- User must have the following security permission to configure Financial Periods settings: Edit repairer profile.
- Users with the following security permission have read-only access to Financial Periods settings: Search and view (read-only) profiles.
- No change was made to existing functionality for 4- and 5-week financial period duration.
- Once configured, shops cannot switch from using 1-week duration to 4-week/5-week duration.
Workfiles: Convert to RO/ Job
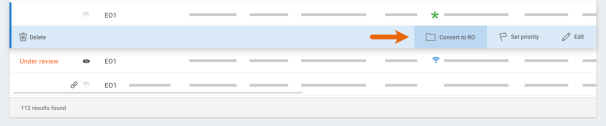
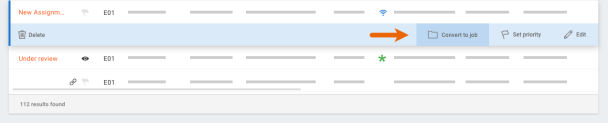
The "Convert to RO" and "Convert to Job" action is now available from workfile search results. Previously this action was only available from within the workfile.
To access this feature:
Log into cccone.com.
Click the menu button in the upper right-hand corner, then select Workfiles.
Select any workfile listed that has not already been converted.
Click Convert to RO or Convert to Job.
After selecting the action, the workfile will open and display the convert wizard. If your shop is setup with manual RO/Job numbering, then you'll be prompted to enter the number as usual. If setup with automated numbering, the next available number is automatically assigned.
Note:
- Convert to RO is only available to shops licensed with the following product: Repair Workflow Repair Order Management.
- User must have the following security permission to access the Convert to RO action: Convert opportunity t repair order.
- Convert to Job is only available to shops without Repair Workflow Repair Order Management.
- User must have the following security permission to access the Convert to Job action: Create and edit workfiles.
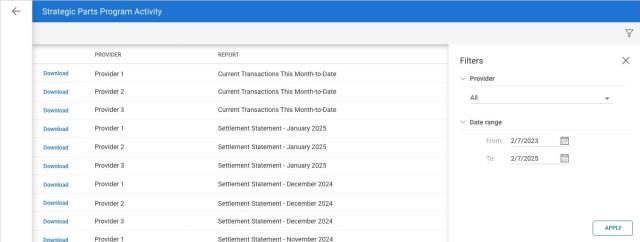
Strategic Parts Program Report
Access to Strategic Parts Program reports is now available in cccone.com. Use these reports to monitor your parts program activity.
To access this feature:
Go to the Parts Dashboard on cccone.com.
Select the Parts Reports button on the left-hand side of the screen.
Select Strategic Parts Program Activity.
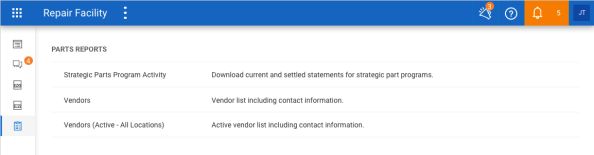
When the list of available reports is displayed you can use the filter controls on the right- hand side of the screen to refine the list. Find the report you want to review, then click Download. The report is automatically downloaded as a .CSV file to your browser's default download directory.
Note:
- User must have the following permission to access the Parts Dashboard: Parts – Manage all aspects of parts procurement from a single dashboard.
- User must have the following permission to access Strategic Parts Program Activity report: Edit repairer profile.
- Historical report data is limited to 2 years - in other words, the system will provide access to reports up to two years in the past from the current date
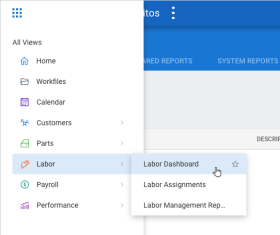
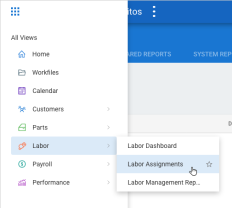
Labor: Labor Dashboard
Shops enabled with Repair Workflow Labor Management features now have the ability to access the Labor Dashboard on cccone.com.
|
To access the labor dashboard:
|
|
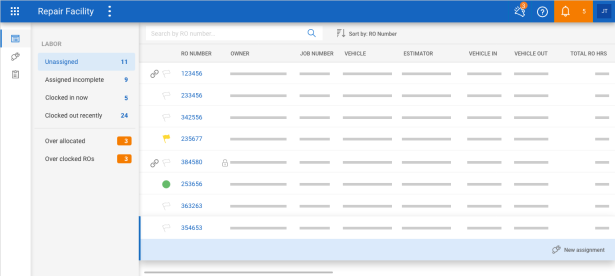
The Labor Dashboard is used to track and manage labor assignments within the shop location. The dashboard includes the following queues:
Unassigned - Use this queue to make sure all open repair orders are fully assigned. From this queue you can create new labor assignments.
Assigned incomplete - Use this queue to flag labor assigned to flat rate/commission technicians and teams as complete.
Clocked in now - Use this queue to monitor employees that are currently clocked in. Results will include any time clocked to shop time, repair orders, or teams. This is a read- only queue.
Clocked out recently - Use this queue to monitor employees that have clocked out without the last seven days. Results will include any time clocked to shop time, repair orders, or teams.
Over allocated - Use this queue to stay on top of repair orders where assigned labor is over allocated. From this queue you can edit assignments on the repair order.
Over clocked ROs - Use this queue to monitor repair orders where technicians have clocked more hours for a given labor type than on the repair order. This is a read-only queue.As with all dashboards, you can sort results by available display columns. Also, you can click the RO number when displayed to launch the corresponding workfile.
Note:
- Shop must be licensed with the following product to access the labor dashboard: Repair Workflow Labor Management.
- User must have the following security permission to access the labor dashboard: Labor - Manage all aspects of labor and payroll from a single dashboard.
- Users with permission to view the Labor Dashboard automatically inherit the permission to create, edit, and delete labor assignments.
Labor: Labor Assignment Search
Shops enabled with Repair Workflow Labor Management features now have the ability to view and edit existing labor assignment on cccone.com from the Labor Assignments search screen.
|
To access labor assignment search:
|
|
From this screen you can search for labor assignments using the following criteria:
Shop location (all or the current logged in location)
Technician or team name
RO number
Assignment create date
RO status (all, open, or closed)
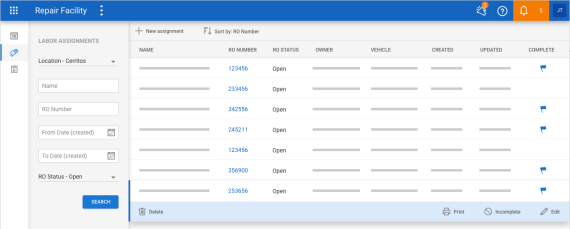
You can sort results by available display columns. You can click the RO number on any result displayed to launch the corresponding workfile. The following actions are also available:
Edit - Provides the ability to edit assignment details. Available only on open repair orders.
Delete - Deletes the selected labor assignment. Available only on open repair orders
Complete/Incomplete - Provides the ability to flag or unflag completed labor on a flat rate/commission technician or team assignment. Available only on open repair orders.
View - Provides the ability to view assignment details in read-only mode. Available on closed repair orders.
Note:
- Shop must be licensed with the following product to access labor assignments: Repair Workflow Labor Management.
- User must have the following security permission to access the labor assignments: Labor - Create, edit, and delete labor assignments.
- Users with permission to view the Labor Dashboard automatically inherit the permission to create, edit, and delete labor assignments.
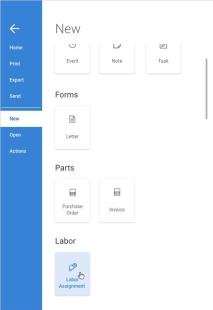
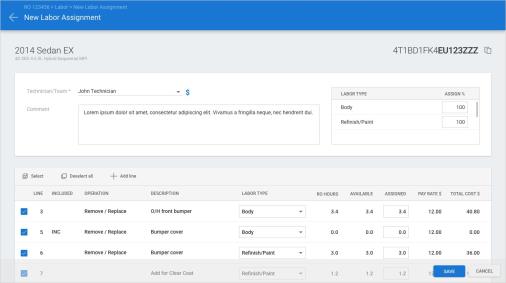
Labor: New/Edit Labor Assignment
Shops enabled with Repair Workflow Labor Management features now have the ability to create and edit labor assignments on cccone.com.
|
To create a new labor assignment:
|
|
|
You can quickly select lines to assign by using the Select button in the line item toolbar. Simply click Select, then select an available labor type. All lines for the select labor type will be selected to assign. You can also add manual lines to the labor assignment. These are assignment lines that are not directly tied to a line on the estimate. To add a manual line click the Add line button in the line item toolbar. A new row is added at the bottom of the line item list. Enter required information to save the line to the assignment. |
|
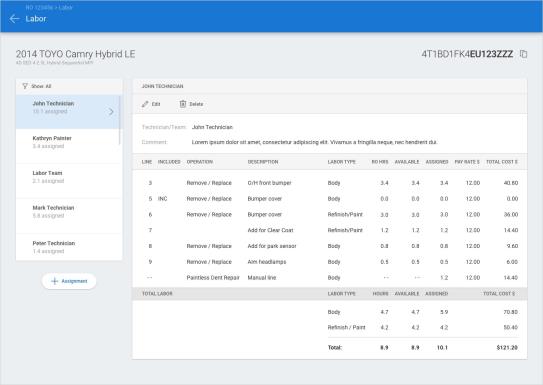
Once an assignment is saved to the workfile, you can access the assignment to view or edit from the workfile menu.
|
To view or edit an assignment:
|
|

|
After selecting the assignment, the workfile Labor screen is displayed. While details for the selected labor assignment are displayed, this screen provides access to all labor assignments on the workfile. Simply select the technician or team assignment on the left side of the screen, and corresponding details will be displayed on the right. While the repair order remains open, users with appropriate permission will be able to edit or delete assignments on the workfile. |
|
Note:
- Shop must be licensed with the following product to create and edit labor assignments: Repair Workflow Labor Management.
- User must have the following security permission to create and edit labor assignments: Labor - Create, search, view, edit, and delete labor assignments.
- Users with permission to view the Labor Dashboard automatically inherit the permission to create, edit, and delete labor assignments.
- When creating a labor assignment, the technician/team can only be assigned labor types that have been configured in their wage profile.
- When selecting line items to assign, assign hours applies the assign percentage configured in the technician/team wage profile by default.
- If user changes the labor type on a line item associated with an estimate line, the user will be given the choice to update the sales account to match.
- Updating the sales account to match the labor type selected on the assignment does not change the labor type written on the estimate.
- Labor assignment lines may be deleted from the assignment only when the line item is not tied to an estimate line.
Labor: Labor Management Reports
Shops enabled with Repair Workflow Labor Management features now have the ability to run Labor Management reports on cccone.com.
|
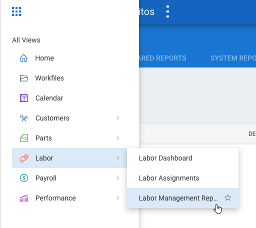
To access Labor Management reports:
|
|
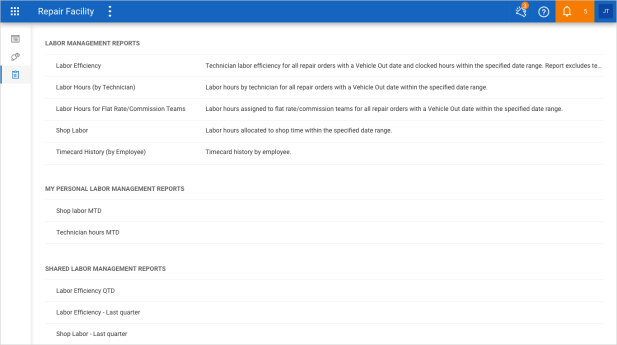
In the Labor Management Reports screen you have access to labor management system reports, personal reports, and shared reports.
|
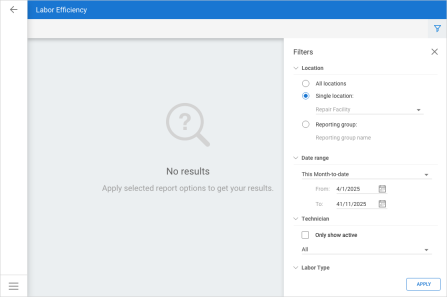
Simply select a report to run, then in the report detail screen select desired filters and click Apply. |
|
Labor Management reports can also be access from the main reports screen on cccone.com. To access reports from the main reports screen:
Select the menu button in the upper left-hand corner of the screen.
Select Performance then select Reports.
Use the tabs at the top of the screen to view System Reports, My Personal Reports, or Shared Reports.
On the right-hand side of the screen, set the Category filter to Labor Management.
Note:
- Shop must be licensed with the following product to create and edit labor assignments: Repair Workflow Labor Management.
- User must have the following security permission to access Labor Management reports: Reports - View labor management reports.
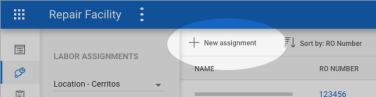
Labor: New Assignment w/ Select RO
Labor assignment functionality was recently released to cccone.com for shops with Repair Workflow Labor Management features. In this release shops can now create new assignments outside of the workfile from the Labor Assignments search screen.
To create new assignments from Labor Assignments search:
Select Labor, then Labor Assignments from the main menu on cccone.com.
In the toolbar, click New assignment.
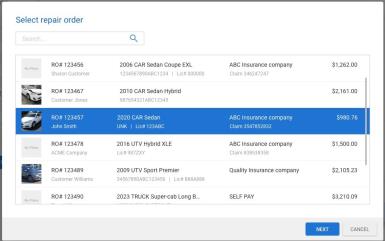
Search for and select a repair order, then click Next.
Enter details in the New assignment screen, then click Save.
When you're done saving your new assignment, you'll be returned to the Labor Assignment search screen.
Note:
- Shop must be licensed with the following product to access labor assignments: Repair Workflow Labor Management.
- User must have the following permission to access Labor Assignment search and create new assignments: Create, search, view, edit, and delete labor assignments.
- The Select repair order screen returns open repair orders within the current logged in location only.
- You can narrow results with a keyword search against the following criteria: RO number.
- Job number, owner last name, estimator, VIN, license plate number, vehicle make, insurance company, and claim number.
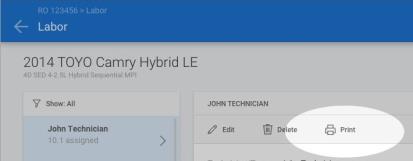
Labor: Print Labor Assignment
Labor assignment functionality was recently released to cccone.com for shops with Repair Workflow Labor Management features. In this release users can now print the technician/ team Work Order report from cccone.com. When printing labor assignments from cccone.com, users can preview a detailed PDF of the assignment then download it to their device. The print action is available in the following locations:
Labor Assignment search screen
Workfile Labor screen
|
|
To print labor assignments from the workfile:
Open a repair order with labor assigned.
Select the menu button in the upper left-hand corner of the screen.
Select Open on the left side of the screen.
Select the labor assignment you want to review.
Click Print in the toolbar for the labor assignment displayed.

Note:
- Shop must be licensed with the following product to access labor assignments: Repair Workflow Labor Management.
- User must have the following permission to access Labor Assignment search: Create, search, view, edit, and delete labor assignments.
- Details in the printed work order report may vary based on Labor - Work Order settings defined in the repair facility profile.
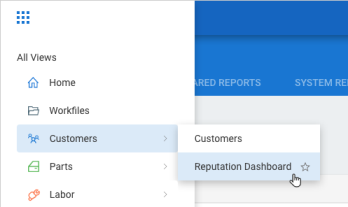
Amplify: Reputation Management
Shops enabled with CCC Amplify now have the ability to launch their Reputation Dashboard from the main application menu in cccone.com. Previously access to the dashboard was only available via Digital Profile settings.
To access this feature:
Log into cccone.com.
Select the main menu button in the upper left-hand corner of the screen.
Select Customers, then select Reputation Dashboard.
Note:
- Shop must be licensed with the following product to access the Reputation Dashboard: CCC Amplify
- User security role must have the following permission enabled to access the Reputation Dashboard: Edit repair facility profiles.
- If user does not have appropriate permission, then the Reputation Dashboard option will be hidden in the main application menu.
- Access to the Reputation Dashboard is still available within Digital Profile settings.
CCC ONE Desktop (All)
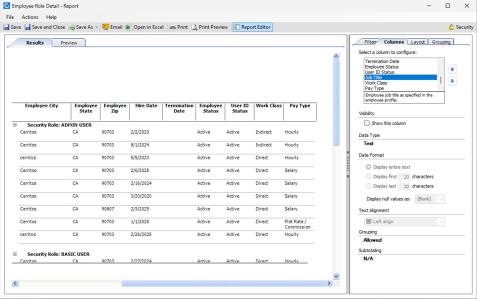
System Reports: Employee Role Detail
The existing Employee Role Detail system report now includes a new optional column called User ID Status. This new column specifies the active/inactive status of the employee's user account.
To access the Employee Role Detail report:
Log into CCC ONE Desktop.
Select the Reports menu, then Find Report.
Select System Admin in the report category menu.
Under System Reports, select Employee Role Detail.
The User ID Status column is hidden by default. To add the column to your report:
Click the Apply button to run the report, from the bottom right.
After results are returned, select the Columns tab in the Report Editor on the right side of the screen.
Select User ID Status in the list of available columns.
Under Visibility, check the box Show this column.
No need to run the report again. The column is automatically added to the results.
Note:
- Shops licensed with the following product will have access to this report: Repair Workflow Repair Order Management.
- User must have the following security permission to access this report: System Admin - View system admin reports.
CCC ONE Desktop Release 52
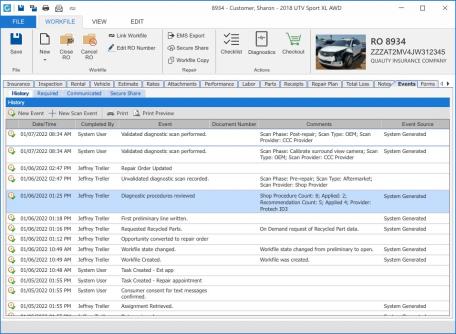
Diagnostics: Diagnostics Workfile Event
CCC ONE will now save a system event to workfile event history whenever the “Review Diagnostic Procedures” window is closed by the user. This new event is logged to the workfile Events tab and contains the following information:
Shop procedures count
Applied shop procedures count
Recommendation procedures count
Applied recommended procedures count
Provider name that returned recommended procedures
To access this feature:
Open a workfile with a standard vehicle.
At the top of the workfile screen, click the Diagnostics button.
Optionally select procedures to add to the estimate.
Click OK, Cancel or X button to close the Review Diagnostic Procedures window.
Save the workfile and go to the Events tab.
Note:
- Shop must have the following licensed product to access diagnostic recommendations: CCC Diagnostics Workflow
- User must have the following permission to edit the workfile: Create and edit workfile
- The event will be logged to the workfile every time the recommendations fly-out is closed using any of the following buttons: OK, Cancel, close "x"
- If recommended procedures are not returned for any reason, the recommendation count and applied count for recommended procedures will be recorded to the event as "0"
- If the Diagnostic Quoting service is not available, then the provider name recorded to the event will be blank
- The diagnostic event added to the workfile is read-only. It cannot be edited, deleted or voided.
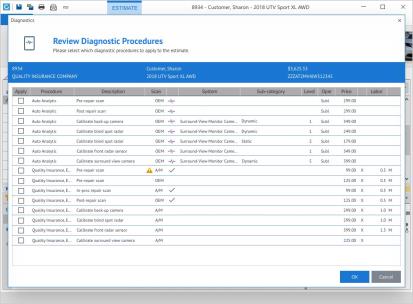
Diagnostics: Diagnostic Procedures
The following updates were made to the Review Diagnostic Procedures window launched from within the workfile:
Added column for Sub-category
Removed column for Sub-system
The "Sub-category" column may be populated with a value on procedure recommendations returned by a scan provider. The values returned may show "Dynamic" or "Static" as returned by the provider. This information is now displayed in lieu of Sub- System.
To access the Review Diagnostic Procedures screen:
Open a workfile with a standard vehicle
At the top of the workfile screen, click the Diagnostics button
Note:
- Shop must have the following licensed product to access diagnostic recommendations: CCC Diagnostics Workflow
- User must have the following permission to edit the workfile: Create and edit workfile
- Each time the Diagnostics action is triggered, calibration recommendations may appear
- Calibration recommendations are contingent on scan provider participation - some scan providers may not support calibration recommendations
- Sub-system information may still be displayed in the recommendation detail fly-out displayed when the user clicks the purple pulse icon on the line
Quickly find your CCC Team members. Go to http://www.cccis.com/collision-repairers/team/ and follow the screen instructions.
