What's New in CCC® Estimating for February 2025
Click here to view the What’s New release notes for CCC® Estimating.
Note: The availability of the features listed below may vary based on the products licensed to your company.
CCCONE.COM - Web Estimating
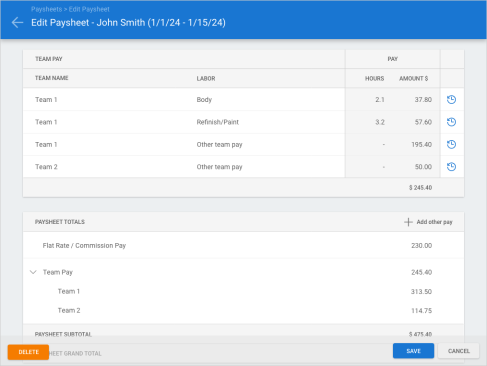
Payroll: Team Pay Breakdown
Shops with Repair Workflow Labor Management features now have access to view employee team pay breakdown under Paysheets on cccone.com. This new breakdown will display the employee's pay by individual team allocation and labor types on the employee paysheet.
To access this feature:
- Select the app menu in the upper left-hand corner of the screen.
- Select Payroll, then select Pay Periods.
- Select a Pending pay period to Edit, or open a new one.
- Click to Edit any paysheet that has team pay.
- View new team pay breakdown.
Note:
- Shop must have the following licensed product to access Paysheets features: CCWLB - Repair Workflow Labor Management.
- User must have the following security permission to access paysheets on cccone.com: Create, search, view and edit pay periods.
- Team pay breakdown is available on employee paysheets when a team paysheet is created or edited after 1/31/2025
- Breakdown by labor types is applicable to flat rate/commission employees only - labor type breakdown is not calculated for hourly or salary employees.
- While pay periods and paysheet detail may be edited in either the desktop application or on cccone.com, team pay breakdown is only visible on the paysheets within cccone.com
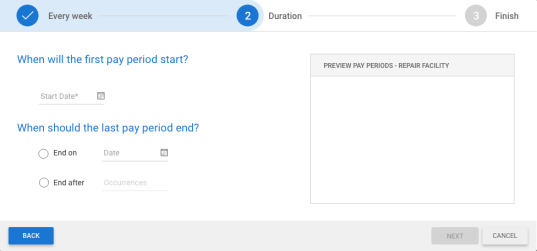
Payroll: Create Pay Periods
To improve usability when creating new pay periods on cccone.com, we've added a back button the Create Pay Periods wizard.
To access this feature:
- Select the menu button in the upper left-hand corner on cccone.com.
- Select Payroll, then Pay Periods.
- Click Add pay periods.
Note:
- Shop must have the following product enabled on their license to access Pay Periods: Repair Workflow Labor Management
- User must have the following security permission to access Pay Periods: Create, search, view and edit pay periods
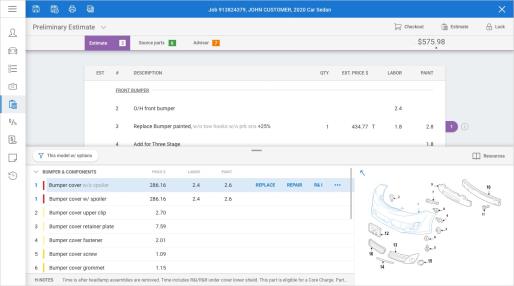
Workfile: Part Database Enhancements
The part database has been updated to incorporate user feedback for improved usability. The following changes were made:
Database Availability
Previously, users had to select the blue + button to expose the part database. This button has been removed. The part database is now always in view on preliminary estimates.
Database Panel
Previously, the part database was fixed in height. Now you can adjust the height of the database panel to suit your needs. Use the grip control on the database toolbar to raise and lower panel height from the default position. Double-click the toolbar to quickly expand or fully collapse the panel to the bottom of the screen.
Available Actions
Actions for adding tires, frame sheet, other charges, and part codes have been moved to the part database panel Groups view. The Resources menu has also been moved to the part database toolbar.
Part Group Filtering
Smart Part filtering has been removed. Previously, this feature automatically filtered groups so that only groups related to the selected primary impact point were shown. Now all part groups are displayed. Other parts filtering features remain unchanged.
To access this feature:
- Log in to cccone.com.
- Open a workfile to Edit.
- Go to the Estimate tab.

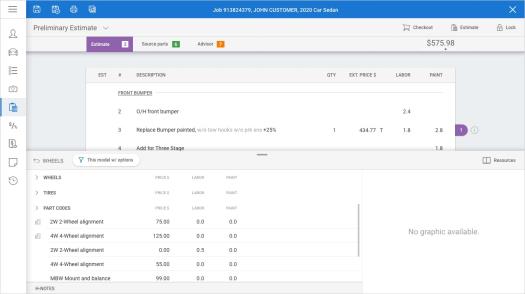
Workfile: Part Code Enhancement
In addition to providing more access to features on the parts database panel, part codes have been incorporated into subgroups. If a part code is configured for a standard part group, you will find a "Part Codes" sub-group within the database group.
To access this feature:
- Log in to cccone.com.
- Open a workfile with a standard vehicle to Edit.
- On the Estimate tab, select a part group with configured part codes.
- Click on the Part Codes subgroup.
- Select a part code, then click Add.
Note:
- User must have the following security permission to edit workfiles: Create and edit workfiles
- A part codes sub-group will only be displayed if part codes are configured for the selected group
- All configured part codes also remain available in the Part Codes fly-out and/or by typing the part code shortcut when adding a line manually
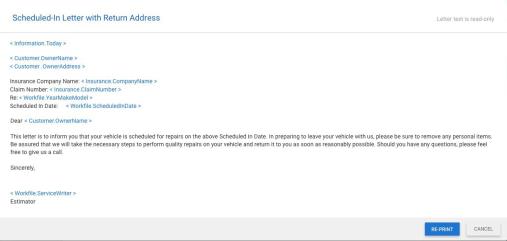
Workfile: Form Letters
Form letters are now available in the workfile on cccone.com. You can add new, save draft, print, and re-print form letters from within the workfile.
To access this feature:
- Open a workfile on cccone.com.
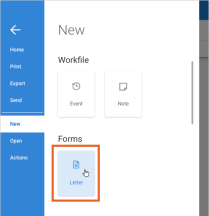
- Select the menu button in the upper left-hand corner of the screen.
- Select New.
- Select Forms > Letter.
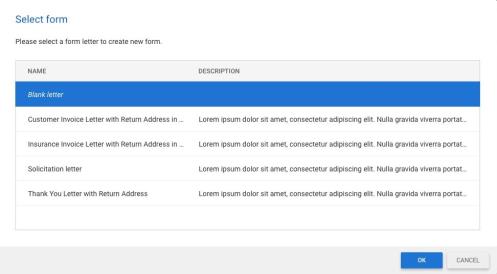
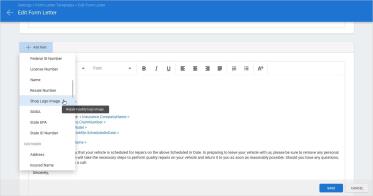
When adding a new form to the workfile, the list of available templates is displayed. Select a template, then click OK. To create an Ad hoc letter from scratch, select the Blank Letter option.
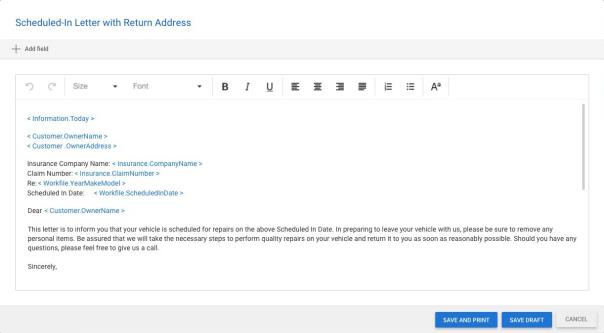
After selecting a template, the editor is displayed. Here you can customize letter content as desired. In cccone.com you'll find that new formatting options are available. Options include:
- Font size
- Font type (eg. Arial, Tahoma, etc.)
- Font color
- Bold
- Italic
- Underline
- Alignment (left, right, center, and justified)
- Numbered list
- Bulleted list
Additionally, using the Add Field action you now have the option to include your shop logo in the letter detail.
Once the letter contains the details you want, you have two options:
- Save and Print - Saves the letter to the workfile and generates a PDF print file
- Save Draft - Allows you to save the letter to the workfile, then come back to edit later
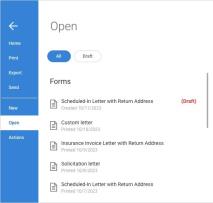
To access forms that have previously been saved to the workfile:
|
|
Note:
- Shop must be licensed with the following product to access forms functionality: Forms and Correspondence
- Shop must convert to centralized forms management before access to forms within the workfile is available
- User must have the following permission to access forms on the workfile: Create and edit workfiles
- Available templates are defined in Settings > Form Letter Templates
- Only active templates that the shop location subscribes to will be available for selection when adding a new form to the workfile
- Forms saved to the workfile from cccone.com are also accessible on the workfile in the desktop application, and vice versa
- Formatting features outlined above are only available on cccone.com - formatting applied to a template or letter will not appear in the desktop application
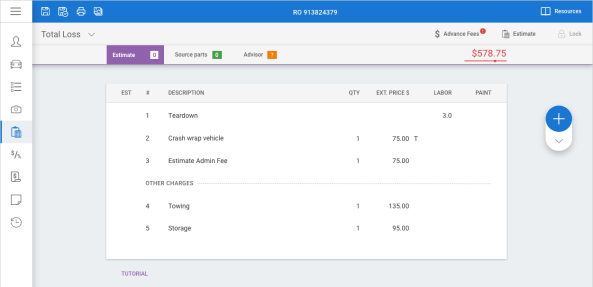
Workfile: Mark As Total Loss
Shops with and without Repair Workflow now have the ability to designate a workfile as a total loss on cccone.com When marked as a total loss, the user can write a total loss estimate for capturing storage, towing, and other fees related to processing the total loss workfile.
To access this feature:
- Create or access and existing workfile.
- In the Workfile tab, select Convert to Job or Convert to RO.
- On the Estimate tab, write a preliminary estimate, then Lock Estimate.
- On the Estimate tab, click Estimate button and click Mark Total Loss.

Once the workfile is marked total loss, the estimate version changes to Total Loss. At this point you can write the total loss estimate. In workfile search results, the estimate version will appear as TTL.
If you determine the file is no longer a total loss, you can easily switch it back to repairable. Simply click the Repairable button and confirm the action. The total loss estimate is deleted and you can continue with the original Estimate of Record.
Note:
- To mark a workfile total loss, user must have the following security permission: Create and edit workfiles
- In order to access the Total Loss button, the workfile must first be converted to a job or a repair order
- The Total Loss estimate uses rates from most recently locked estimate or supplement
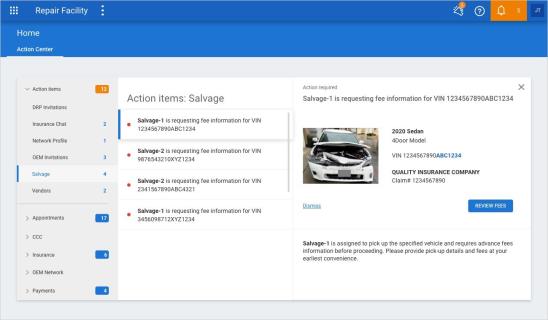
Advance Fees: Salvage Action Items
To support Advance Fees functionality, a new Action Items node called "Salvage" has been added to Action Center. When a salvor sends a request for fees, an action item is generated and placed in the "Salvage" node. From the action item the shop can review and submit fees to the salvage company.
To access this feature:
- Go to Action Center on cccone.com.
- Select Action Items, then select Salvage.
- Select an item in the list to view details.
Within action items the following information is available:
- Name of the salvage company requesting fees information.
- VIN for the requested vehicle.
- Year, make, and model of the vehicle.
- Insurance company and claim number if present on the workfile.
Note:
- "Salvage" action items are available to all CCC Estimating shops.
- To receive fee requests from a salvage company, the shop must be configured to share data with salvors.
- Users with the following security permission may view and act on salvage related action items: Create and edit workfiles.
Advance Fees: Digital Wallet
To support Advance Fees capability, a new setting called Digital Wallet is available on cccone.com. With Digital Wallet settings, shops can configure payment preferences for accepting electronic payments from configured salvage companies.
To access this feature:
- Go to Settings on cccone.com.
- Select Digital Wallet.
Note:
- Digital Wallet settings are available to shops with or without Repair Workflow
- User must have the following security permission to access Digital Wallet settings: Manage Digital Wallet
- Digital Wallet settings are hidden when the following company attribute is enabled for the repairer in Web Support tool: Advance Fees – Enable wallet at company level
- If shop is configured to manage Digital Wallet at the company level, shop must work with their account representative to update their configuration
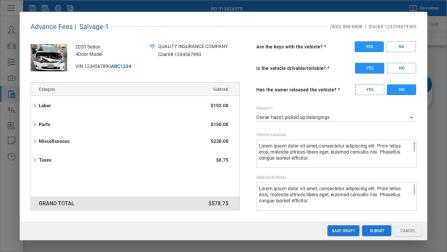
Advance Fees: Submit Fees
Shops now have the ability to send advance fees to salvage companies when requested. When the shop receives a request for fees from the salvage company, the shop receives a Salvage action item in Action Center on cccone.com. From the action item, the shop can launch the Advance Fees screen for the associated workfile.
Within the Advance Fees screen, fees information is pulled from the current total loss estimate. The shop must answer a few questions, then can submit fees to the salvage company. Once fees are submitted, the salvage company may initiate payment on those fees electronically. The shop receives notifications when the payment transaction is initiated and another notification when its completed.
To access this feature:
- Go to Action Center on cccone.com, then select Salvage under Action Items.
- Select Review Fees.
- In the Advance Fees screen, review fee totals.
- Answer Yes or No to required questions, then enter any additional notes.
- Select Submit.
If the shop isn't ready to submit fees, fee information can be saved by selecting Save Draft.
To access the Advance Fees screen again, go to the workfile Estimate screen, then click Advance Fees. From there the shop can review what was sent, update fees information and re-submit to the salvage company as needed.
Note:
- Advance Fees functionality is available to shops with and without Repair Workflow.
- To receive fee requests from a salvage company, the shop must be configured to share data with salvors.
- To submit fees, the shop must first configure their Digital Wallet settings.
- User must have the following security permission to submit fees: Create and edit workfiles.
- A total loss estimate is required to submit fees to the salvage company.
- Fees information is sourced from the total loss estimate (includes estimate lines and other charges)
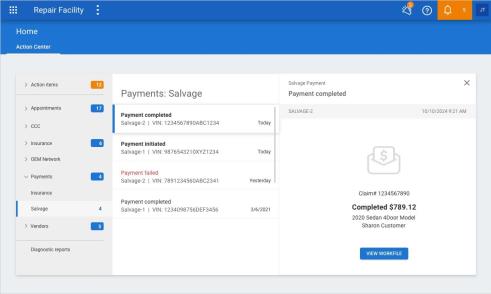
Advance Fees: Payment Notifications
To support Advance Fees functionality, a new Payments notification node called "Salvage" has been added to Action Center. Once the shop submits fees information to the salvage company, the shop may receive payment status updates. A notification is sent for the following payment statuses:
- Payment initiated - The salvage company has initiated a new payment transaction to the shop.
- Payment completed - Payment from the salvage company has been processed successfully and shop has received the funds.
- Payment failed - An error was encountered and the payment transaction did not complete.
To access this feature:
- Go to Action Center on cccone.com.
- Select Payments, then select Salvage.
- Select an item in the list to view details.
Bonus! Payment status is also reflected in the Updates column of the workfile search screen. Once the workfile is opened, the status is cleared from workfile search results.
Note:
- To receive fee requests from a salvage company, the shop must be configured to share data with salvors.
- Only users included in a notification group configured for salvage events will receive salvage related payment status notifications.
- If no notification group exists, then salvage related payment status update dates will be sent to users with the following security permission: Edit repair facility profile
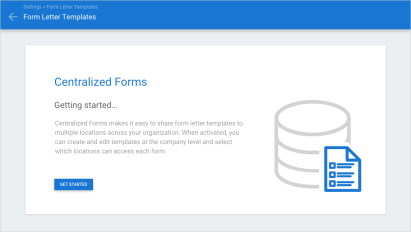
Settings: Form Letter Templates
Centralized management of Form Letter Templates is now available on cccone.com. Within the desktop application, form letter templates are managed within the repair facility profile. For MSOs this requires updates to forms settings for each location within the organization. On cccone.com, shops can convert existing forms management so that templates are created and edited at the company level rather than by location.
To activate centralized forms:
- Go to Settings on cccone.com.
- Select Form Letter Templates.
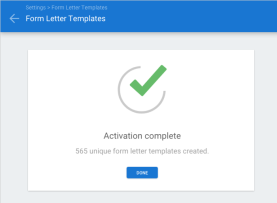
- Complete the activation wizard.
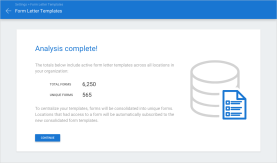
The activation wizard will examine all form letter templates at all locations within the organization. Forms are evaluated for duplicates across locations, duplicate forms will be consolidated. Analysis results are displayed before completing the conversion. Results include a count of all forms at all locations and the total count of forms expected post conversion. From the results screen, confirm the action to activate centralized forms to complete conversion.
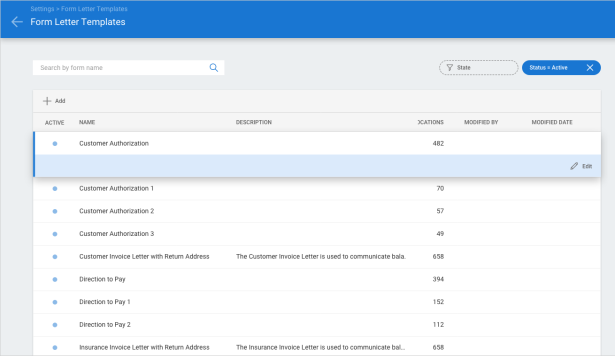
Once centralized forms are active, you can:
- Create new form letter templates.
- Edit details on existing form letter templates.
- Update locations subscribed to a template.
- Activate or inactivate prior existing templates.
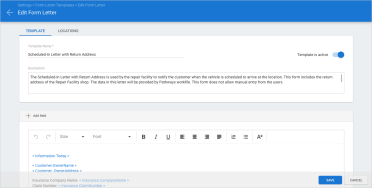
Within the template editor you'll also find new formatting tools available. Available options include:
- Font size
- Font type (eg. Arial, Tahoma, etc.)
- Font color
- Bold
- Italic
- Underline
- Alignment (left, right, center, and justified)
- Numbered list
- Bulleted list
Additionally, using the Add Field action you now have the option to include your shop logo in the letter template.
Note:
- User must have the following permission to access forms on cccone.com: Forms - Manage centralized forms.
- Form conversion must be completed to activate centralized forms.
- Once centralized forms is active, Form Letter Templates will no longer be available in the repair facility profile in the desktop application (version 49.0.0.12230 and higher)
- When updating a letter template, updates are applied to all shop locations subscribed to the form
Settings: Notification Groups
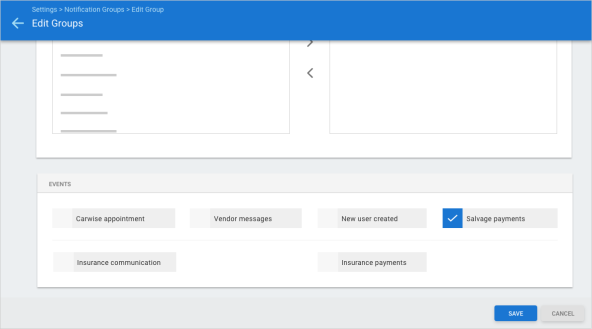
To support Advance Fees functionality, a new "Salvage" event type has been added to Notification Group settings. This new event type allows shops to configure notification groups for salvage related activity in Action Center. When a notification group with the salvage event exists, only users in the notification group will be able to see items in the following Action Center views:
Payments > Salvage
To configure notification groups:
- Go to Settings on cccone.com.
- Select Notification Groups.
- Select a group to Edit or Add a new group.
- Update group members and event types as desired, then click Save.
Note:
- User must have the following security permission to edit notification groups: Edit repair facility profile
- If there is no notification group with the "Salvage" event type, users with the following permission will receive salvage related items in Action Center: Edit repair facility profile
CCC ONE Desktop Release 50
Diagnostics: Dashboard Usability
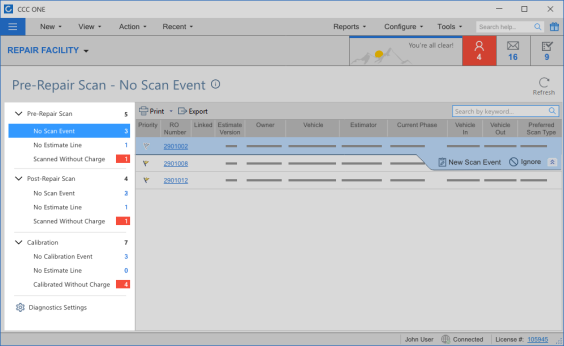
Shops enabled with CCC Diagnostics Workflow will find the following usability enhancements have been made to the Diagnostic Dashboard in the desktop application.
- Total item count displayed for queue groups
- Queue groups remain expanded
These enhancements were made based on user feedback. Now you can see the total count of items in Pre-repair, Post Repair, and Calibration queues. You can also expand all groups and they will remain expanded as you click to view items within the individual queues.
To access this feature:
- Log into the desktop application.
- Select the menu button in the upper left-hand corner of the screen.
- Select Diagnostics.
Note:
- Shop must be licensed with the following product to access the Diagnostics Dashboard: CCC Diagnostics Workflow
- User must have the following security permission to access the Diagnostics Dashboard: Diagnostics Dashboard - Manage exceptions on diagnostic workfiles
Diagnostics: Ignore Item
Shops enabled with CCC Diagnostics Workflow now have the ability to "ignore" items that appear in the Pre-repair Scan queues. Specifically, items in "No Scan Event" and "No Estimate Line" queues.
To access this feature:
- Log into the desktop application.
- Click the menu button in the upper left-hand corner of the screen.
- Select Diagnostics.
- Select either No Scan Event or No Estimate Line queues under Pre-Repair Scan.
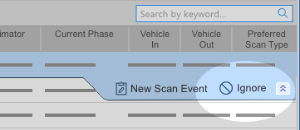
- Select an item displayed in results, then click Ignore.
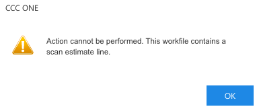
Once an item is set to ignore, it is removed from all Pre-Repair Scan queues. The item will also be excluded from Post-Repair Scan queues. In the event a scan is performed or a scan line added to the estimate, the workfile may reappear in exception queues.
|
|
Note:
- Shop must be licensed with the following product to access the Diagnostics Dashboard: CCC Diagnostics Workflow
- User must have the following security permission to access the Diagnostics Dashboard: Diagnostics Dashboard - Manage exceptions on diagnostic workfiles
- The user is prevented from completing the "ignore" action if either a scan event or scan estimate line exists on the workfile
Diagnostics: Calibration Recommendations
Shops enabled with CCC Diagnostics Workflow have the convenience of scan- provider recommendations for vehicle-specific calibration operations. CCC ONE is now returning additional operations and values so that scan providers can return more precise recommendations. As a part of these enhancements, CCC ONE now includes Labor Type, Labor Time and Operation (assuming these values are received from the scan provider).
To realize the benefit of this feature:
- Open a workfile with a vehicle specified.
- Click Diagnostics to review applicable diagnostic procedures.
Rows with a purple “pulse” icon indicate calibrations recommended by the scan provider. Each calibration recommendation from the scan provider may now show an Operation (Repair, Sublet or Other) as well as a corresponding Labor Type and Labor Time.
Note:
- Shop must be licensed with the following product to access the Diagnostics Dashboard: CCC Diagnostics Workflow
- User must have the following security permission to access diagnostics recommendations within the workfile: Create and edit workfile.
- Each time the Diagnostics action is triggered, calibration recommendations may appear.
- Calibration recommendations are contingent on scan provider participation - some scan providers may not support calibration recommendations.
Quickly find your CCC Team members. Go to http://www.cccis.com/collision-repairers/team/ and follow the screen instructions.
